I looked everywhere for instructions on how to do it, all I could come up with was this, and it isn't even about fiber reactive dye. I used half the recipe from the above link. So here's how I did it.
Bunny our cat decided to get in on the action :) First of all you will need: Urea(4.79), Soda Ash and Sodium Alginate SH (9.49) Get sodium alginate SH not F, unless you are dyeing silk. I got this stuff at our local art store, the price I paid is in brackets ( in CAN dollars). You will also need: medical gloves (rubber gloves are rather cumbersome), a bucket, a paint pallet (or egg carton), paint brushes, measuring spoons and cups (not to be used for food after), glass jar, dust mask, 4oz. squeeze bottles (I found mine in the cake decorating section of Michaels), plastic garbage bags to cover your work surface and Jacquard Procion MX dye in the colors you like. Oh yes, and you will also need something to dye. The more natural fibers the better, I used.a 100% cotton shirt.
Put 1/2tsp. of Alginate SH into 1 cup of warm water.
Get a good grip on the jar, and shake it like crazy! When it's as mixed as it's going to get from shaking it, you may want to use your gloved fingers to squish out the big lumps.

It should now be kind of like a pourable gell, mostly lump free. I didn't manage to get them all out, but it seemed to work out all right.
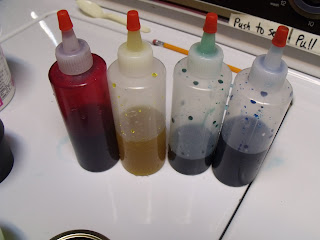
Measure out 1/4 of the mixture, then pour into your bottles. It should be enough for about four bottles (one of my bottles was about half as full as the others, I must have spilled a bit).
Then add 1/2 tsp. of dye, and shake it up till it's all mixed up. Make sure to use the dust mask when using powdered dyes. If you inhale it you can get lung sensitivity, and that would end your dyeing forever. SO BE CAREFULL!!! And keep a wet cloth handy to wipe up any spilled dye, before it drys. If it drys it could become airborne, and that's not good.
Soak your shirt in some soda ash water for 45 min. After that, wring out the excess. Now you can either lay it out on some plastic to dry, or you can start painting right away. If you let it dry first, you will get more control and less bleeding. If you paint on it wet, it makes more of a watercolor look. This shirt was done wet.
Lay the shirt out on a cut open garbage bag. I put some strips of a bag inside the sleeves and in the body of the shirt so it didn't bleed through. Next start painting whatever you can dream up, I did a landscape with trees.
Paint...paint...paint...
and paint...and paint..
Ta da! A fresh spring landscape!
I folded the hood up and folded the arms. If you have a lot of detail, or don't want it to get smudged, put some plastic in between. I just have clouds, so I didn't care.
Sandwich the shirt between two layers of plastic, then roll it up and let it sit for 24 hrs. Then wash out the excess dye. Make sure to wash it really well, so you don't end up turning purple if someone dumps a bucket of water on you! This is speaking from experience.....


that looks amazing! :)
ReplyDeleteFantastic! I hope you don't mind if I link back to your post for "Wish I Made It Wednesday" on my blog. :-)
ReplyDeleteNo I don't mind! Go right ahead and link away!!! :)
ReplyDelete