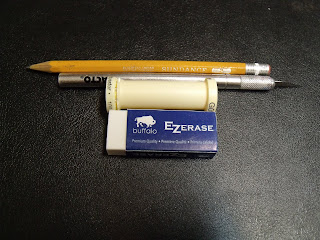
If you have ever wanted to make your own stamp....well here it is!
Here is a list of what you will need:
- An old Gutermann thread spool
- A Exacto knife
- Something to cut on (I just used my notebook, but you may want to use a cutting mat to be safe)
- A pen or pencil
- A eraser (I used a EZ Erase by buffalo, you don't want one thats too stretchy, more crumbly and sort of hardish....if any of that made sense)
- Some ink or paint to try it out with!
- Some paper to stamp on
The ingredents.
Start by tracing the shape of the spool on to the eraser.
Cut out the shape, being sure to go directly down. Shave bits off, untill it fits snugly in the end.
Draw your initial backwards on the eraser. Make sure that it's backwards now! Because if it is the right way now, when you stamp it will be backwards!!! Ahhhh! Oh no! So avoid that.

I thought I took a picture of the cutting away of the exess, but I guess I didn't. Basicly just cut staight down around the shape of the letter. Then horizontaly cut up to that line, and pull out the bits that should now be loose. After that you pop the eraser into the spool, and you are done! Now to try it out, I just used some paint applied with a paint brush, because I was too lazy to go dig out the ink pads (it's a lot of digging, and I mean a LOT)
Stamp, stamp, stamp, stampity stamp! Yay! It worked!
I cut out a circle of craft foam and glued it on the top with Weld Bond. Before I glued it on though, I stamped the "J" on the foam, just because it makes it looks so much cuter! Enjoy your stamps :)


No comments:
Post a Comment